Styling a kid-friendly space in an open plan house can seem tough at first, especially when you don't want to forfeit “style” for practicality. Although I would love for Charlie to be able to play and have toys in every room, I am not so much into the “my house looks like a daycare center” look. So a few weeks ago, while we were styling Suzanne's Playroom, we shot this quick little video about how to style a playroom shelf, keeping it both functional and aesthetically pleasing. Let's get into it.
Easy Peasy . . . and in only 6 steps (step 6 being my favorite):
1. Store unsightly toys and other necessary items in more attractive storage bins.
2. Bring in playful art to help ground the shelves and add atmosphere.
3. Displaying some of the cuter toys doubles as both storage and decor.
4. Maximize space by storing puzzles vertically, and stack books both horizontally and vertically to help the eye move around the shelves.
5. Finally, mix in some grown-up items to pull the whole thing together, and keep it from just being a toy shelf.
6. Open up a bottle of wine, because this playroom isn't just for the kids anymore. Happy shelfie-ing.
Hi Crafters! This is Mindy from Savvy Sisters. I'm so excited to share with you my Patriotic decoration for my home! For one because I like how it turned out, but also because this is my first patriotic decoration I've made for my home and I'm so excited to have it on display! I've never decorated for this holiday and I don't plan on going all out, but I love the simpleness of this one with the 3 stars in the Red, White and Blue. I hope you enjoy it! Also I don't know if you noticed, but the red is not paint, it is Rit Dye so you can get the look of a stain with the wood grain showing through.
Lightly sand. Paint 2 coats of Navy Blue. Paint star White, once dry sand edges. Paint stain over the star and wipe off with paper towels or old rag. Using wood glue, glue star to block.
White Block:
Lightly sand. Paint 2 coats of White. Once dry, sand the edges and apply stain to the whole block. Wipe stain off with paper towel or old rag. Soak star in red dye, 5 minutes on each side. Let dry and glue to block using wood glue.
Red Block:
Lightly sand. Use the Rit Dye and mix the whole bottle with 16 cups of hot water into a large container (I used a storage bin). Place your block in and soak each side for 5 minutes. When finished pull out and lay to dry on an old towel you don't care about. For more detailed directions and pictures, I followed Shanty2chic directions. Then just paint your star Navy Blue and use the wood glue to adhere it to the block.
I love the idea of using these Rit Dye's to look like a stain, just in some fun colors! And it was pretty easy to use!
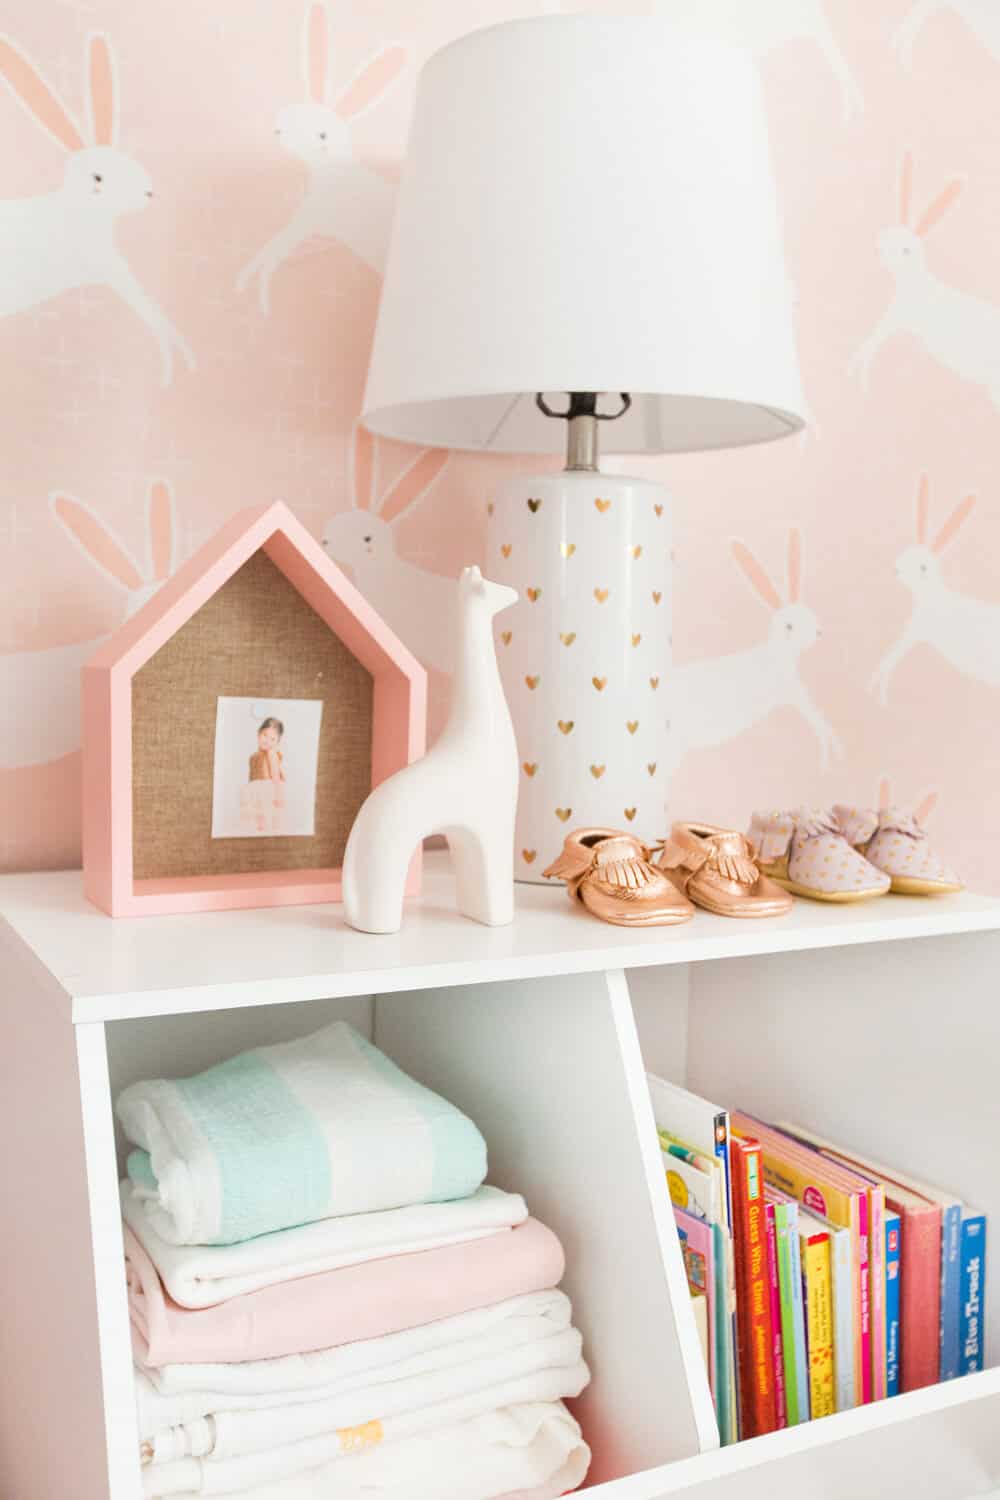
Welcome to the sweetest little nursery for the sweetest little baby ever (except Elliot's and Charlie's and of course all of yours, obviously). It's teeny, tiny, but kinda perfect just like that new little baby that sleeps there. The best part? All, yes all of the furniture and accessories are from my (America's) favorite retailer, Target. It was fast, easy, affordable, and totally steal-able. Hop on in, little bunny.
We were at Jen and Jayson's home, meeting about the upstairs playroom makeover when she showed me the room for their expecting baby. I said, “Jen, no offense, but …may I?” They had just moved in and the furniture was too big and bulky for this room (don't worry, it was handed down to a friend). I was going to be shopping for kids furniture anyway, installing at their house anyway, and honestly nurseries have become old bonnet to me because I've done so many. They are easy, fun, and I figured really good content.
So we lumped it in and we designed/styled that room as well. Here's what it looked like before:
We created a mood board using a combination of Target's new Pillowfort line, baby, Oh Joy and Threshold – the whole gang is playing together here perfectly.
That wallpaper became the hopping off point (HA) of the whole nursery, then we layered neutral furniture and punched it up with the accessories. Keep reading while I break down the whole process – or just watch the video of the whole makeovers:
Welcome home, little baby.
From now on I'm only designing rooms for the unborn. It's just so easy – you only need a few small furniture pieces (crib, chair, changing table, maybe storage, rug) and none of those pieces tend to be too expensive so there is less stress in the design process, and then yea, the client almost always approves.
This room was actually only a temporary nursery – for the first year. Upstairs, by the playroom near Sienna's room will be this baby's real kid room. This room is really close to the master bedroom and will eventually be the guest room, so we didn't want to do anything too permanent on the walls. Enter this amazing temporary wallpaper. We found it via Chasing Paper and it is basically just contact paper that you put on your walls. Its perfect for a temporary room as its not pasted and won't last forever. They recommend a really smooth wall for best application. Our wall had a bit of texture but we were fine with it. Our wallpaper installer was not, though and he found it hard to install because he's a total perfectionist. I think when it comes to temporary wallpaper you don't hire someone, do it yourself and don't obsess too much about matching it perfectly. You can shift it, peel it off and replace, and just know that making it perfect can be hard.
It's such a sweet color and pattern – not too busy for a small space but with enough life to add personality (which means you don't really have to do a lot of other things to make it look exciting.)
The changing table is part of the Babyletto collaboration which is so simple, warm and great to transition into a bigger kids room. We didn't put anything above the dresser because babies have go-go-gadget arms and can rip anything off the walls. We mounted the mirror in Charlie's room with insane glue, and we have definitely hung little mobiles over changing tables, but otherwise keep those little bodies safe.
That side table is one of my favorites in the Threshold summer collection.
I have these stacking white bins in our playroom, too, and while they aren't fancy or particularly stylish, they are so practical – Charlie can access toys easily and help put things away afterwards. For the shoot we styled them out all cute, but as you can imagine ours certainly don't look like that right now.
I love how the whole room turned out – simple, happy, sweet without a lot of bells and whistles and yet it feels impactful and stylish. Here are a few things you might be thinking:
1. No blackout shades. Jen and Jayson have some rolling blackout shades on their way, but they weren't there for the shoot – so don't worry, they are coming.
2. You may have noticed that there is a mobile hanging over the crib in the video but not in the shots – its a funny story. We made a DIY pom pom mobile for the nursery and it was all sorts of adorable, but I didn't know that Target has agreed to all Safe Sleeping guidelines which says nothing in the crib or over it. Whoops. So we had to edit the DIY out of the video and photos. The wallpaper was so hard to photoshop that we had to send it out to a retoucher to get it done right which is why it took this post so long to get published. There is some footage of it in the video that you can sneak a peek at if you'd like.
Jen was 36 weeks pregnant there. Yes, life is unfair. And Ive seen her since and she looks like nothing ever happened.
I love this adorable little happy family of three that just got their world rocked by adding another child. While we were shooting I did a decent amount of warning about how exhausting the transition from one to two young children is. I think they were like 'ok, i get it, its going to be hard'. Then when I saw them a couple weeks they both looked at me and said 'YOU WERE RIGHT THIS IS CRAZY HARD'. It gets easier, sweet family, hang in there.
No makeover story is complete without a proper before and after:
All the before furniture was gifted to someone else, don't worry.
I hope you enjoyed this little bunny themed sweet nursery. If you are into it you can go get that look yourself:
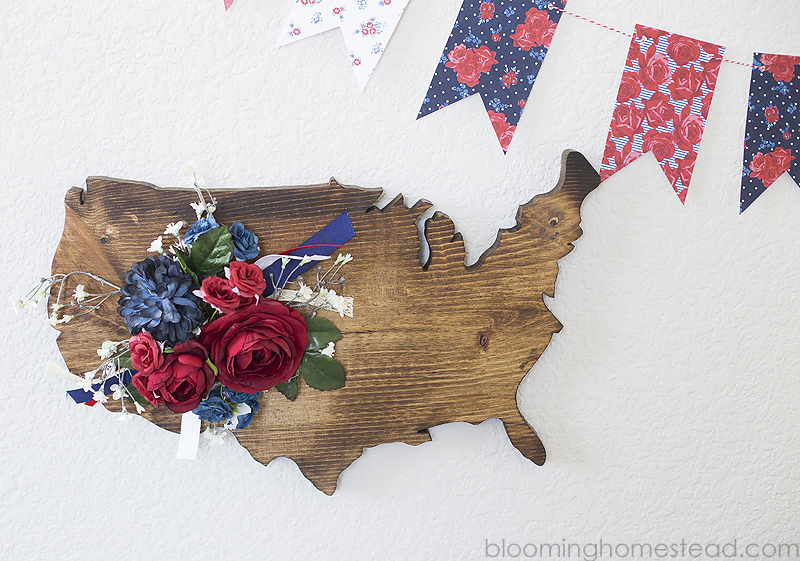
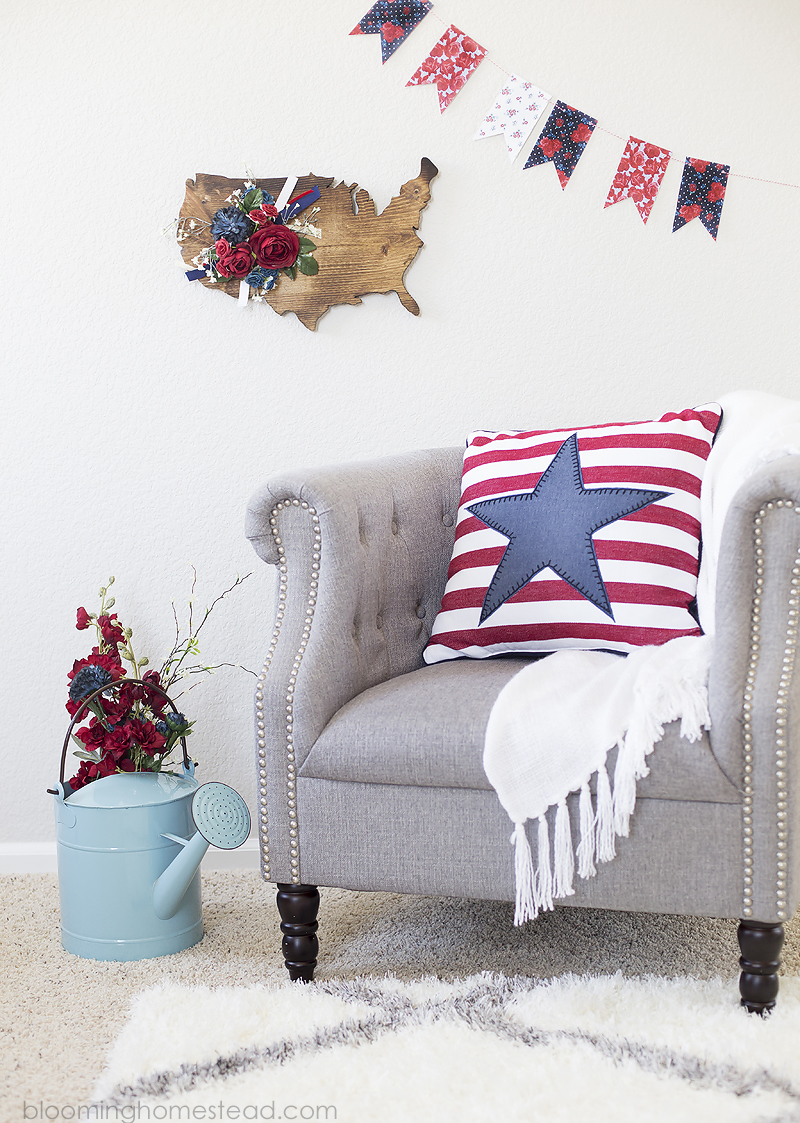
Hi Friends! It's Marie from Blooming Homestead and I'm here to share a fun project with you today. The 4th of July is definitely one of my most favorite holidays and I love decorating in festive patriotic red, white, and blue. Today I am sharing this lovely rustic floral USA sign. Isn't it lovely?
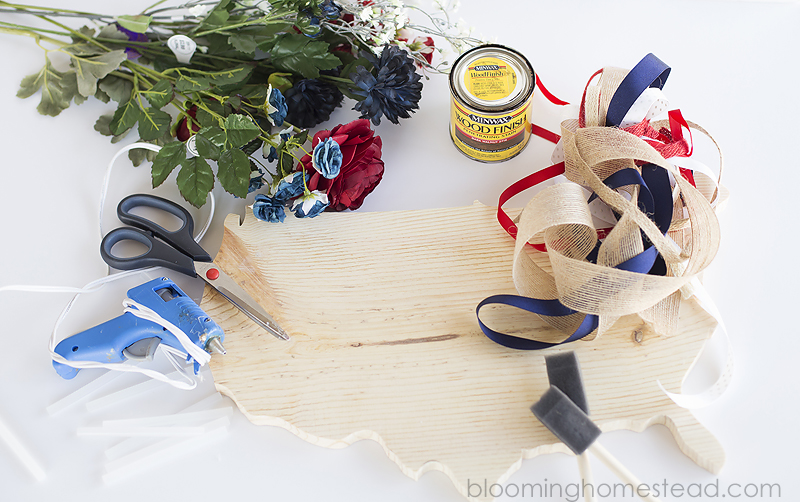
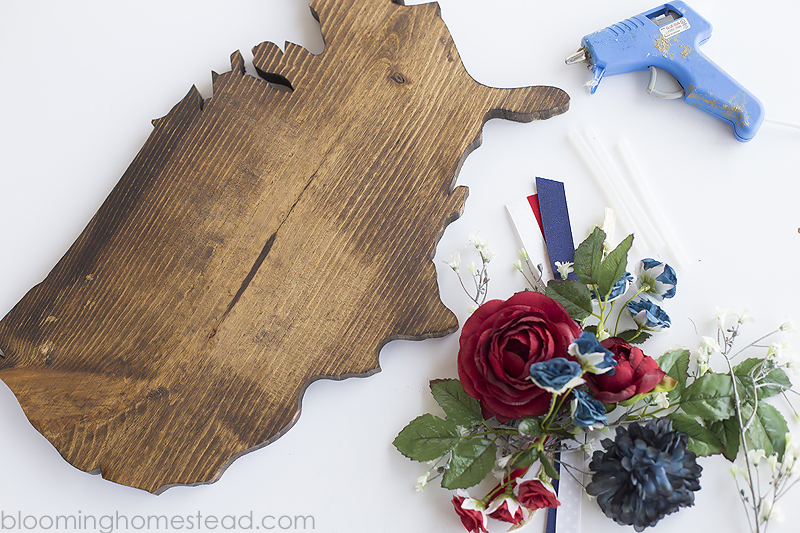
Here are the supplies you need to make your own Rustic Floral Sign:
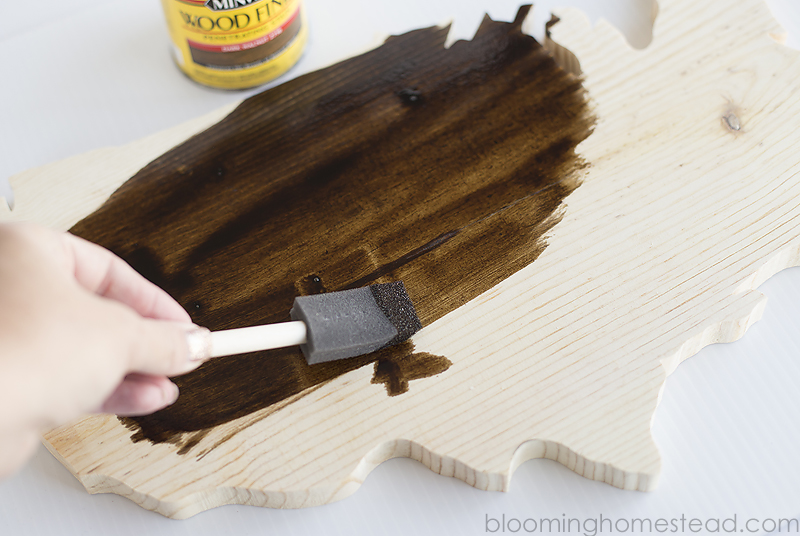
Step 1: You're first step is to stain your wood USA sign. You'll gently sand it if necessary to ensure a lovely finish. When the wood is ready, you'll apply a thin layer of stain to the entire piece. Let it dry.
Step 2: You'll start prepping your flowers by removing the stems from the flowers.
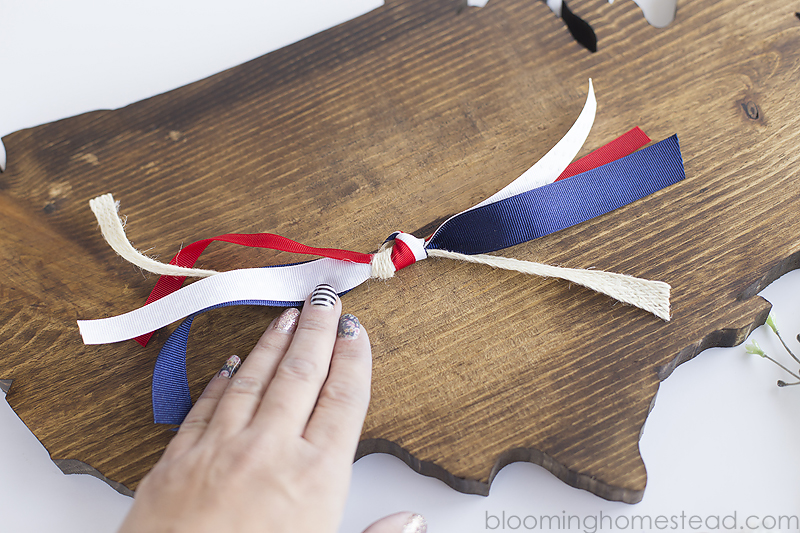
Step 3: You'll also gather a few patriotic ribbons and trim them down to about 9 inches long and tie a knot in the center.
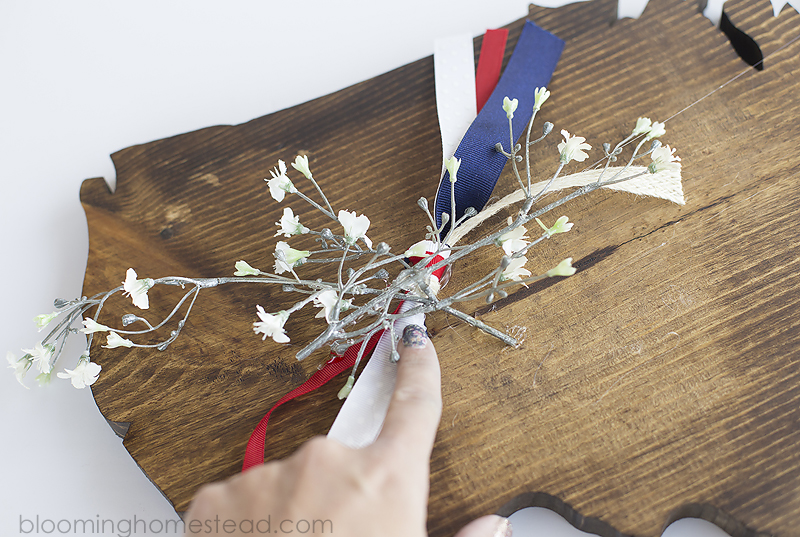
Step 4: When the stain is dry, you'll hot glue your ribbons onto the sign. Next you'll start applying your filler flowers.
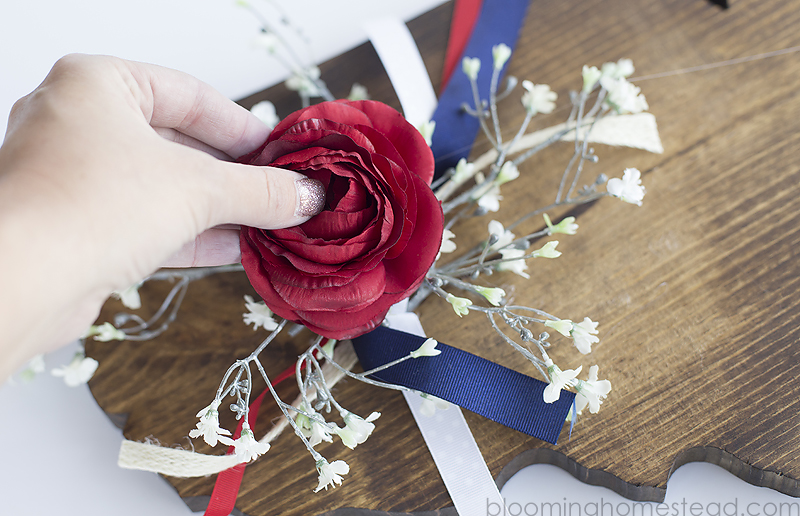
Step 5: Finish off by gluing on the larger blooms.
Add hanging hardware and you're all set!
Don't you just love how it turned out? Such a fun twist on the iconic USA map. If you are interested, you can find the free printable floral banner here
Bread boards are all the rage in kitchen decor. Today on My Craft Channel we are going to show you how to decorate them so you can incorporate them into your home decor.
Take 25% off bread boards when you shop online at thewoodconnection.com and use code “kitchen” or in stores and mention My Craft Channel. Valid through July 1, 2016
Hey there! Amy here from The Happy Scraps today. I'm sharing this USA Plank Sign with you. Aren't the new plank signs at The Wood Connection so fun?! I love them! When I saw this 14″ x 24″ Framed Plank Sign and the USA Map Door Hang, I thought they'd go great together. Today, I'm going to show you how I put this USA Plank Sign together. It makes a great statement piece for the 4th of July or you could keep it up all year long.
I taped of the center section of the framed plank and stained it.
While the stain was drying, I painted the USA Map Door Hang white.
And painted the cute little heart with rooster red.
Once my stain was dry, I taped off the outer frame, and painted it white.
Once all my paint was dry, it was time to glue everything together. I glue my heart onto the map, about where Utah is, then glued the USA to the Framed Plank.
I decided after I had it all put together, that it would look good to have the edges of the USA distressed slightly, so I sanded them. This would be easier to do, before it's glued to the plank, but it is possible.
Isn't that little heart so cute. It adds just the right touch to the sign as well.
Now are you ready to grab the supplies and make your own? This really was an easy project, and pretty quick too.
It goes so well with my other 4th of July decor as well.
I hope you'll come on over to The Happy Scraps and see what other fun projects I've got there. Thank you to The Wood Connection for having me on their site today. I always love sharing fun projects here.
I could sense Ivan's anticipation mount as we turned off the highway. We'd been seeing nothing but southern pine and swamps for a while, and he seemed to know he was about to experience something completely different from the Carpathian mountains. He asked me to stop so he could take a picture of the sign for the Goodwin Heart Pine Lumber Company.
Saw blade on sign...excellent.
As we headed down a gravel road into the swamp, Ivan sat at attention and started taking pictures non-stop. I'm not sure how he translated the sign below in his head, but it was perfect. He was suddenly completely interested in alligators and where they might be lingering.
Vot does "Dead End" mean, exactly?
At the end of the road, we rolled through the gate of George and Carol Goodwin's passion...the headquarters of their Goodwin Lumber Company. George figured out a few decades ago that pulling old longleaf pine and cypress logs from the swamp and rivers in the area could be profitable, and he's been buying and sawing them ever since.
Carol runs the business from a nice office in the front of the property, filled with samples of products made from their products.
Carol's office.
Have you ever seen a floor medallion filled with pine?
Curly heart pine...a unique and elegant look for cabinetry.
George runs the headrig, and as I watched him turn the logs I recognized the experience of one who has been opening great logs for a long time. Each one was turned deliberately until the perfect face presented itself. And what appeared was some of the most beautiful art that nature can provide.
As we stood watching George and his hands at their trade, the unique smell of the old-time Gulf Coast mill took me back to my roots. Fresh-sawn heart pine, with its high pitch content, produces a profusion of that sweet smell that one never forgets, and mixed with the sour smell (think vomit) of fresh cypress, it made for the perfect sweet and sour combination. As we used to say in our mill houses just outside the big mills in Diboll..."smells like money."
You know it's a great business that turns old reclaimed stumps into enduring home construction treasure.
You've seen pecky cypress boards or wainscotting? Well, here's what it looked like before it met the saw.
As nice as the mill visit was, I think what happened next really left the biggest impression of Southern hospitality on Ivan. The Goodwins not only booked our hotel room at a local inn, but they insisted on paying for it...and then they treated us to a fine dinner in one of the nicest trendy restaraunts in Gainesville. And hearing that Ivan preferred vodka to our American whiskey, George made sure that we sampled plenty of single-barrel gold just so Ivan had basis for a fair comparison. I believe our sample size was sufficient.
Dr. Sopushynskyy, looking cool after having checked around the back of the tree for a gator.
Having witnessed the production of one of the finest wood products on this planet, Ivan wanted to learn more about these Southern pines and their ecosystem. We began to explore the coastal southern pine forest the next day.